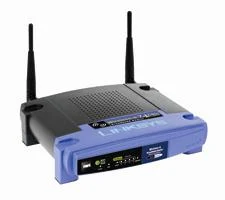
Welcome to the System Admin training tutorials by CoreNetworkZ EdTech Solutions. Today, I will explain the least interfered wireless channels supported by the Linksys WiFi router.
My regular readers know that CoreNetworkZ published hundreds of tutorials, and changing the wireless channel is a part of many troubleshooting guides.

Some of my readers asked why this step is critical. I believe this article will satisfy them.
This article explains how to change the wireless channel of an access point or router.
I developed this guide based on a popular Linksys Router Model.
Linksys is one of the popular brands of SOHO network devices. Although this tutorial mentions a specific model, the procedure applies to other vendors' products. It is because the concept remains the same for all WiFi devices.
The Best Wireless Channels to Use for a Linksys 2.4 GHz Wireless Router
Before changing the selected wireless channel, it is essential to understand that I recommend only three channels for a Linksys 2.4 GHz wireless router.
The interference-free channels are 1, 6, and 11.
I understand that you may be thinking why other channels are useless. Thomas Samuel, a 5th semester B.Tech Computer Science student, asked, "Why don't you recommend channel 3 for my new Linksys router?"
Let me answer Thomas in this section. I suggested that he choose channels 1, 6, or 11.
I didn't recommend other channels because they are prone to interference.
Should I Manually Change Wireless Channels on a 5 GHz Band Router?
Datta Kiran, one reader of CoreNetworkZ, asked this question. He purchased a Linksys 5 GHz wireless band router and was confused about choosing the best channel.
My answer was simple. Don't bother much. A 5 GHz Linksys router supports 23 non-overlapping channels.
So, the chances of wireless interference are minimal. However, in rare cases, people complain about wireless interference.
Arun Dholakia asked, "Hello Alex, I live in a service apartment. Here, many 5 GHz routers are present. I fear wireless interference."
Arun has a Linksys 5 GHz WiFi router.
Some of you may be in a similar situation. So, let me share a suggestion.
I recommend using a WiFi analyzer to check for the least used WiFi channel. I suggest the following open-source tool for Android phones to conduct that search.
How To Change the WiFi Channel of an Access Point (AP)?
I understand that some users prefer to choose a channel of their own choice. Sam Richardson, a YouTuber, asked, "I have a Linksys Velop and want to change the channel manually. Can you help me?"
Archita Gupta, a fashion designer, asked, "Hello Alex, can I change the channel of a Linksys Wireless AC EA dual-band router?"
I will answer Sam and Archita here.
If you want to change the currently selected wireless channel, follow the instructions below. Although these instructions are for a specific vendor's product, the procedure is generally the same for all routers.
Log in to the Linksys Setup Page
Open a web browser, and type the router's IP address in the address bar, then press Enter. The default IP address for Linksys routers is 192.168.1.1.
Enter the Linksys AP username and password. For a brand-new Linksys router, leave the username field blank and enter "admin" as the password.
If you have previously set a different username and password, use that information instead.
Change the Wireless Channel
Click on the Wireless tab and navigate to Basic Wireless Settings.
Locate the current wireless channel setting. You can change it to one of the three recommended channels (1, 6, or 11). If you choose 5 GHz, any one of the 23 channels will work fine.
If you prefer not to enter a channel manually, select Auto. So the device will automatically pick the least congested (interference-free) channel.
Save and Log Out
Once you've made the changes, save the settings and log out. You have now successfully changed the wireless channel on your Linksys router.
I will conclude this article now. This tutorial explained how to find the best wireless channel for a Linksys WiFi router and change the current wireless channel. If you have questions, you can ask in the comment section.


Is it possible to change the channel without connecting to the internet? I have a lot of interference from other networks in the area which is only allowing my router to connect locally (hence no internet connection on which to connect to the linksys homepage). Thanks.
ReplyDeleteYes you can change the wireless channel. Here you are changing the wireless Channel of your Linksys wireless router and that has no connection with Internet.
ReplyDeleteIs this wireless channel 1 ,6 and 11 only for Linksys or can I use it for my router? I am using netgear wireless router. Thank you
ReplyDeleteWireless channels 1 ,6 and 11 are common for all wireless routers and not a proprietary one. You can use these channels for your Netgear wireless router.
ReplyDeleteThanks. I changed my wireless channel to 11. Now my wireless is working fine.
ReplyDelete